Source control and Git keeps getting more and more important for both Developers and Operations guys. Getting up and running with Git on MacOS or Linux is very easy as most things are built in. There are also cool tools like oh-my-zsh to customize your prompt.
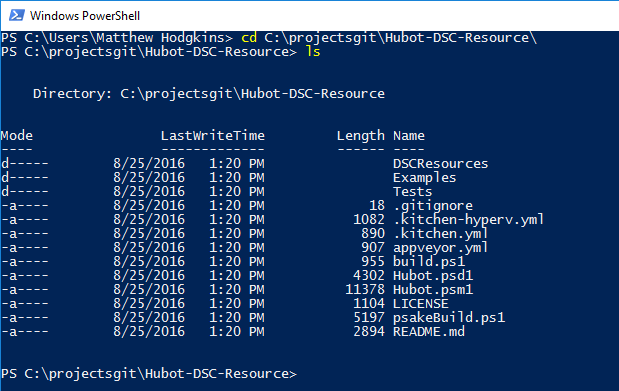
On Windows, it’s a bit of a different story. Let’s spend a little time installing ConEmu and Git, then customizing it to take our prompt from something that looks like this:
to this:
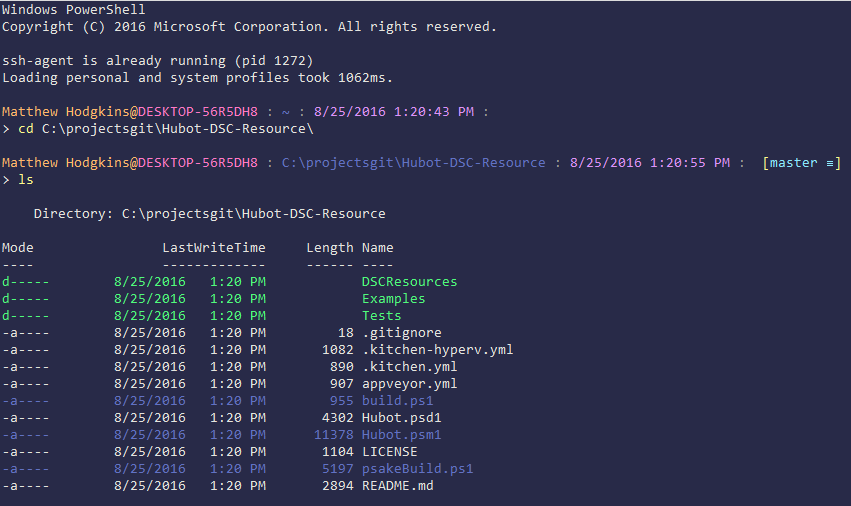
By the end of the article you will have a great looking prompt, a nice Git setup using ssh keys and even be able to squash commits on Windows.
📢 Want to be notified when I post more like this? Follow me on Twitter: @MattHodge 📢
Install required components#
We will be installing the following tools for our ultimate git setup:
Chocolatey- a Windows package manager- Chocolatey Packages
git.install- Git for WindowsConEmu- Terminal Emulator for Windows
- PowerShell Modules
posh-git- PowerShell functions for working with Git
Open an Administrative PowerShell prompt and enter the following:
# Set your PowerShell execution policySet-ExecutionPolicy -ExecutionPolicy RemoteSigned -Force
# Install Chocolateyiwr https://chocolatey.org/install.ps1 -UseBasicParsing | iex
# Install Chocolatey packageschoco install git.install -ychoco install conemu -y
# Install PowerShell modulesInstall-PackageProvider NuGet -MinimumVersion '2.8.5.201' -ForceSet-PSRepository -Name PSGallery -InstallationPolicy TrustedInstall-Module -Name 'posh-git'
Close out of your PowerShell window.
ConEmu#
Open up ConEmu. I like to use this instead of the standard PowerShell prompt.
On the first launch of ConEmu, you will be prompted with a fast configuration dialog. Click OK and continue. We will customize it manually.
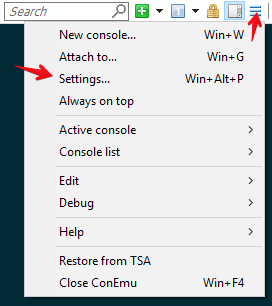
Open up the settings menu and configure the below settings.
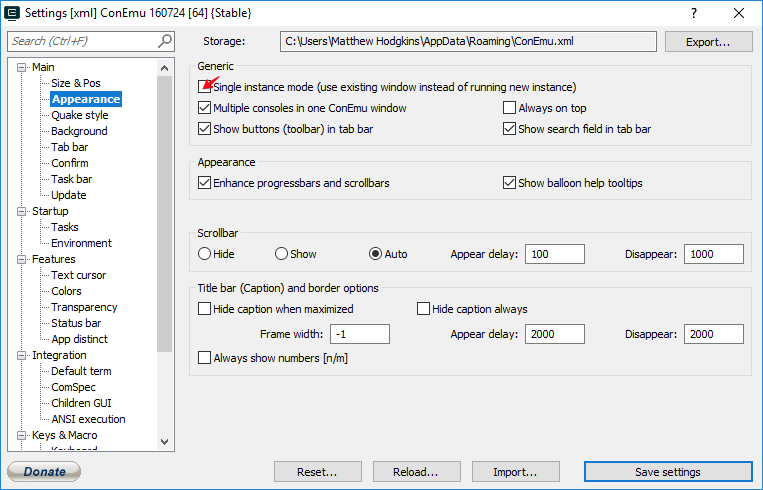
Enable single instance mode#
Prevent multiple copies of ConEmu starting. Use the tabs instead!
Enable Quake mode#
This is a cool one, it makes ConEmu slide down from the top of your screen like the Quake terminal used to.

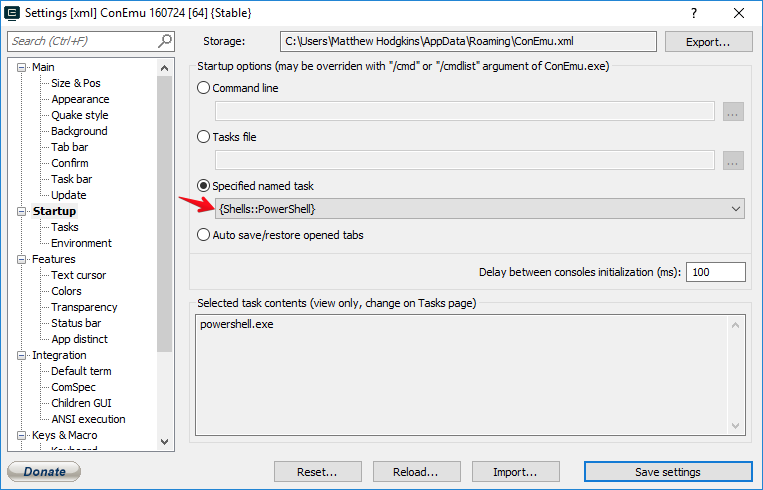
Set PowerShell as the default shell#
Who uses cmd anymore? Set the default shell to PowerShell.
Verify Quake mode hotkey#
Get the most out of Quake Mode by setting a hotkey.

Set a custom color scheme#
You can customize ConEmu you a color scheme. Check out the ConEmu Theme GitHub Repo. My terminal example above is using the Dracula theme.
PowerShell Profile#
We have a nice terminal theme, but let’s do a few finishing touches to make it pop.
Create and edit the PowerShell Profile#
PowerShell can load some settings every time it starts, which is known as the PowerShell Profile or $PROFILE.
To create/edit your $PROFILE do the following:
# Creates profile if doesn't exist then edits itif (!(Test-Path -Path $PROFILE)){ New-Item -Path $PROFILE -ItemType File } ; ise $PROFILEThis will launch the PowerShell ISE so you can edit the profile.
posh-git and Ssh-Agent#
The first thing to do inside your PowerShell Profile is to import the posh-git module. Next, you should add the Start-SshAgent command. ssh-agent will manage our keys for us.
Add the following to your $PROFILE
Import-Module -Name posh-git
Start-SshAgent
This will give us some functionality when working with Git repos.
Customize the prompt#
Let’s make our prompt a little cooler and customize it a little.
I like the prompt that Joon Ro created over at his blog. I modified it slightly:
# Import module from previous stepImport-Module -Name posh-git
function Test-Administrator {    $user = [Security.Principal.WindowsIdentity]::GetCurrent();    (New-Object Security.Principal.WindowsPrincipal $user).IsInRole([Security.Principal.WindowsBuiltinRole]::Administrator)}
function prompt {    $realLASTEXITCODE = $LASTEXITCODE
    Write-Host
    # Reset color, which can be messed up by Enable-GitColors    $Host.UI.RawUI.ForegroundColor = $GitPromptSettings.DefaultForegroundColor
    if (Test-Administrator) {  # Use different username if elevated        Write-Host "(Elevated) " -NoNewline -ForegroundColor White    }
    Write-Host "$ENV:USERNAME@" -NoNewline -ForegroundColor DarkYellow    Write-Host "$ENV:COMPUTERNAME" -NoNewline -ForegroundColor Magenta
    if ($s -ne $null) {  # color for PSSessions        Write-Host " (`$s: " -NoNewline -ForegroundColor DarkGray        Write-Host "$($s.Name)" -NoNewline -ForegroundColor Yellow        Write-Host ") " -NoNewline -ForegroundColor DarkGray    }
    Write-Host " : " -NoNewline -ForegroundColor DarkGray    Write-Host $($(Get-Location) -replace ($env:USERPROFILE).Replace('\','\\'), "~") -NoNewline -ForegroundColor Blue    Write-Host " : " -NoNewline -ForegroundColor DarkGray    Write-Host (Get-Date -Format G) -NoNewline -ForegroundColor DarkMagenta    Write-Host " : " -NoNewline -ForegroundColor DarkGray
    $global:LASTEXITCODE = $realLASTEXITCODE
    Write-VcsStatus
    Write-Host ""
    return "> "}
Colorize your directory listing#
When we do a ls or dir wouldn’t it be nice to be able to colorize folders or certain file types instead of just having a boring list that looks the same?
Check out the Get-ChildItem-Color repository. I added the contents of Get-ChildItem-Color.ps1 to my $PROFILE.
I then overwrote both the ls and dir aliases by adding the following into my $PROFILE:
Set-Alias ls Get-ChildItem-Color -option AllScope -ForceSet-Alias dir Get-ChildItem-Color -option AllScope -ForceGit#
Now we have a nice terminal to work with, let’s get Git setup.
Open up ConEmu.
Add C:\Program Files\Git\usr\bin to Path Variable#
First up we need to add the C:\Program Files\Git\usr\bin folder to our path variable. This folder contains ssh-add and ssh-agent which we will be using to manage our SSH keys.
# Permanently add C:\Program Files\Git\usr\bin to machine Path variable[Environment]::SetEnvironmentVariable("Path", $env:Path + ";C:\Program Files\Git\usr\bin", "Machine")Restart ConEmu for it to take effect.
Generate a key#
Let’s generate our ssh key.
# Generate the key and put into the your user profile .ssh directoryssh-keygen -t rsa -b 4096 -C "your@email.com" -f $env:USERPROFILE\.ssh\id_rsaAdd the public key to GitHub#
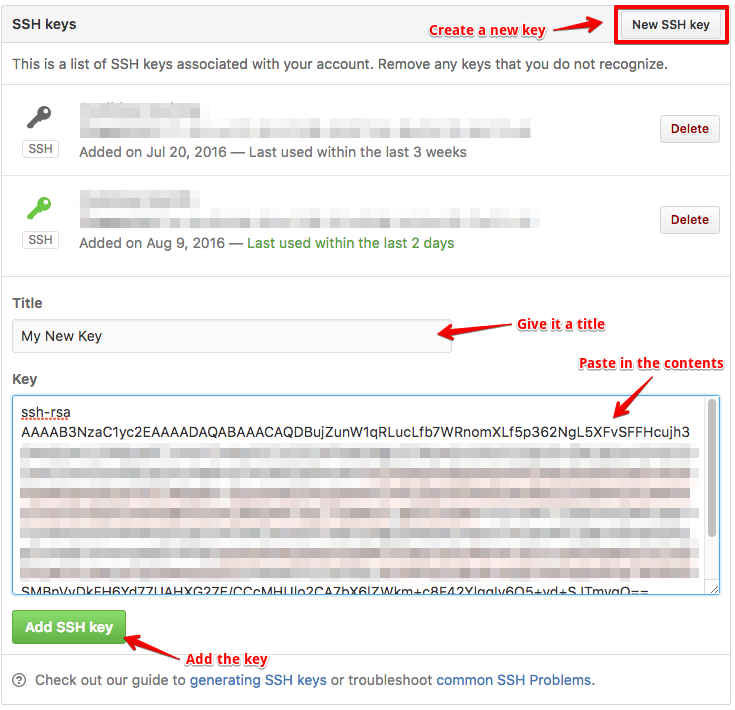
Once we have a generated SSH Key, we need to give GitHub the public key.
# Copy the public key. Be sure to copy the .pub for the public keyGet-Content $env:USERPROFILE\.ssh\id_rsa.pub | clipOpen up your GitHub settings and choose SSH and GPG keys on the left.
This process is similar for BitBucket.
Add our key to ssh-agent#
When we try and push to our git repository, our machine will need to authenticate us using our SSH Key. A tool called ssh-agent keeps track of the keys we have and authenticating against GitHub for us.
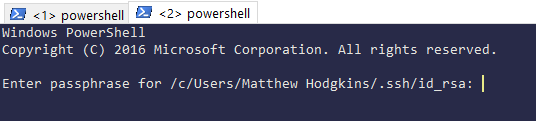
With Start-SshAgent added to our profile, when you open up a new PowerShell prompt (or tab in ConEmu), ssh-agent will notice the id_rsa.pub in our $env:USERPROFILE\.ssh directory and attempt to load it:
If you don’t see this prompt you, ssh-agent had probably started before the ssh key existed, try stopping and starting it:
Stop-SshAgentStart-SshAgentYou can also manually add a key to ssh-agent:
Add-SshKey $env:USERPROFILE\.ssh\id_rsaTo view the keys that ssh-agent knows about, you can list them:
# List ssh keysssh-add -lIf you wanted to remove your keys from ssh-agent for some reason:
# Remove all ssh keysssh-add -DTest authentication to GitHub#
To test that your ssh key is working, you can run the following command:
# Test ssh connection to GitHubssh -T git@github.com
Configure global Git settings#
Finally, we can configure some global Git settings:
git config --global user.email "your@email.com"git config --global user.name "Your Name"git config --global push.default simplegit config --global core.ignorecase false
# Configure line endings for windowsgit config --global core.autocrlf true
Squash commits#
Do you commit a little too often? Me too. It’s all good and well until we go and make a pull request on someone else’s repository and they are a little anal about keeping the Git history clean. Maybe you just feel embarrassed at the amount of commits you do and want to cover your tracks.
To fix this, we can “squash” our commits down so they just appear as one.
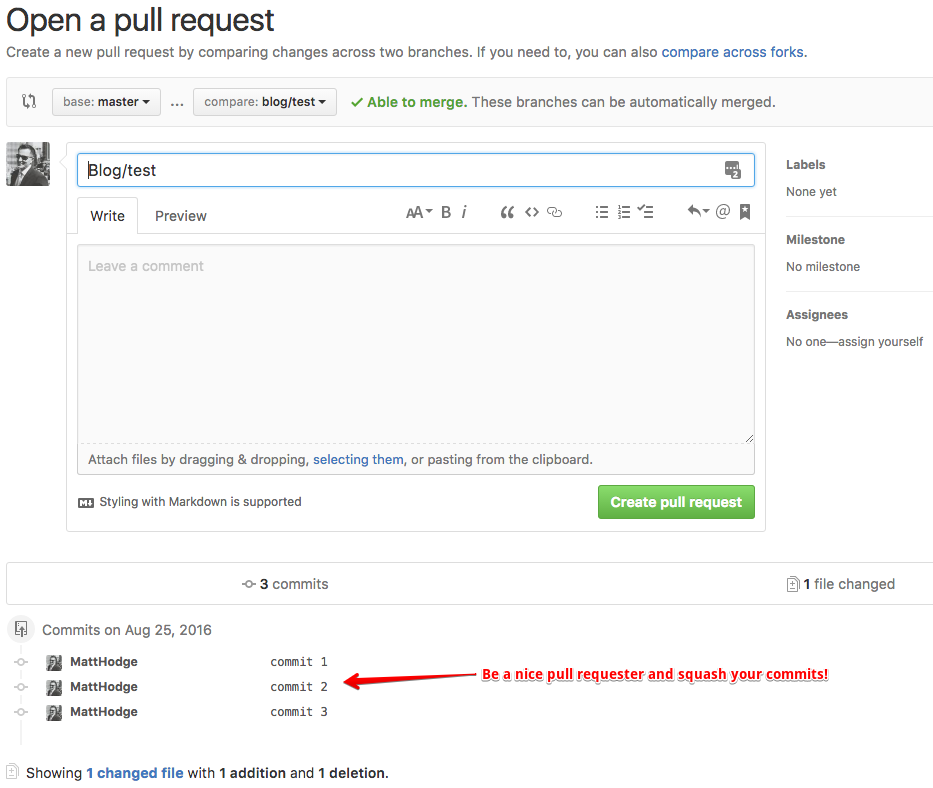
Here is what a pull request looks like with several commits:
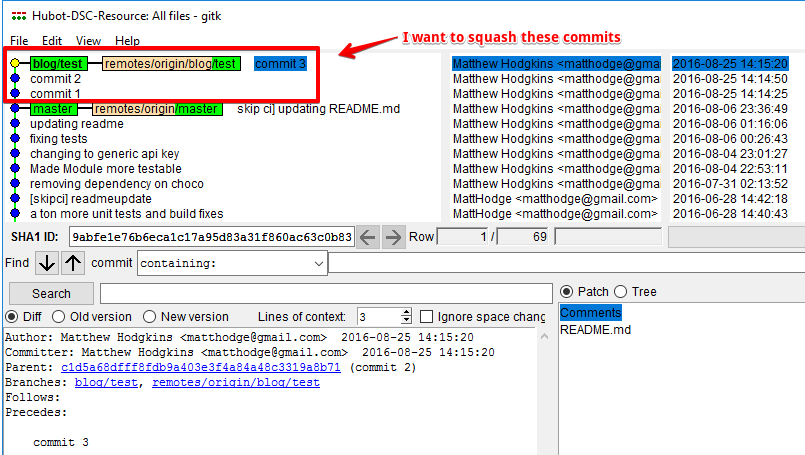
The easiest way to squash commits on Windows is to use the gitk tool.
Back over on our repository:
# run the gitk toolgitkThese are the commits I want to squash:
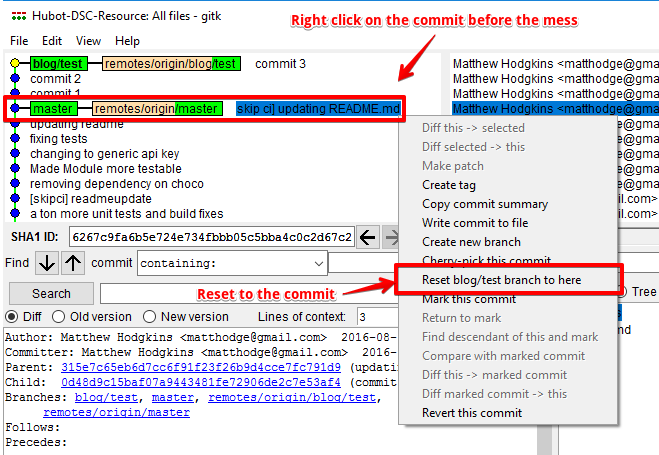
I select the commit before I made the big mess, and choose Reset <branch> to here.
Choose Mixed: leave working tree untouched, reset index
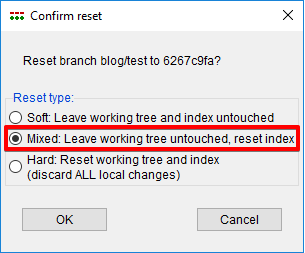
What this has done is reset your branch / repo to before the commits, but has left your changes untouched. We can now re-add the changes.
# see the state of the repogit status
# add your changes backgit add .
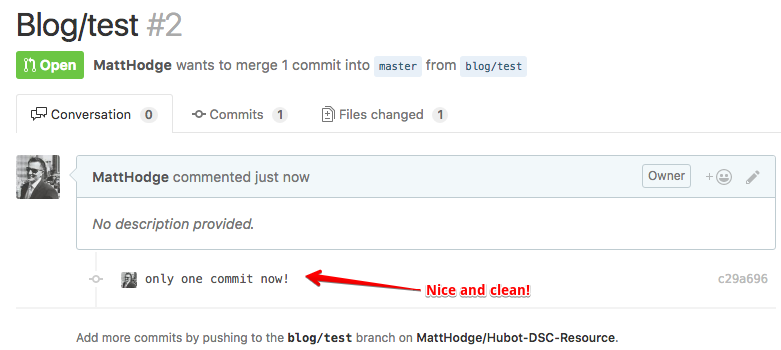
# commit your changesgit commit -m "only one commit now!"
# git push with the --force switchgit push --forceYour commits will be squashed nicely now, and even if you had a pull request open, it will have been updated:
Thanks to Matt Wrock (@mwrock) for this tip!
Conclusion#
With that, we have a pretty awesome looking PowerShell prompt and can work nicely with git repositories. We can even squash commits on Windows!
Enjoy Quake mode :)